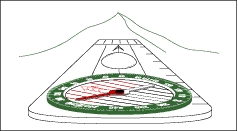
Back Bearing - when on a line feature
Using a Back Bearing to identify your position when on a Line Feature. 1. Point the Compass at an easily identifiable feature – e.g. the summit of a prominent hill, some farm buildings, a corner or edge of a forest etc. Click here for an interactive illustration of a Compass 2. Turn the Compass Housing until the Red End of the pointer lines up with the Red End of the needle. 3. To get Grid North, deduct the magnetic variation (currently approx. 3 degrees). 4. Place the compass on the map and rotate the Whole Compass until the lines in the compass housing are parallel to the vertical blue grid lines on the map. Do not move the compass housing. 5. Slide the compass so that one of the long sides touches the feature you took a bearing from, taking care to keep the lines in the compass housing parallel with the map’s grid lines. 6. Draw a Line along the edge of the Compass from the summit to your Line Feature. Where this line crosses the Line Feature is your position. Strictly speaking the bearing from the identifiable feature to your position will be the bearing from your position plus 180 degrees. i.e. If you take a bearing on a summit and the compass says its 60 degrees, then the bearing from the summit to your position will be 60 + 180 = 240 degrees. However, since the compass will line up on your position anyway, without adding anything, you can ignore this finery. Also note that a compass only goes up to 360 degrees, so sometimes adding 180 will give you a result higher than 360 degrees – e.g. a Target which has a bearing of 240 degrees, will give a result of 420 degrees if you add 180. To use a Back Bearing to identify your position when not on a line feature see Back Bearing - when not on a line feature |
 |


